cooking

I Beg Your Parsley

I am fortunate enough to be able to grow a lot of the herbs I use to cook and eat. But you know, sometimes I can’t. Or I just don’t feel like it. And off I go to buy fresh herbs from my local farmer’s market or from the French Broad Food Co-op. (Click here to learn more about food co-ops and find one near you.)

So I get a big, beautiful bunch of parsley/cilantro/dill/etc., and it’s almost always more than I need, unless I’m making a vat of salsa or keg’s worth of tabbouleh. (Note to self: Share my tabbouleh recipe in the next newsletter.)

Yes, yes, yes…I know I can blanch the herbs, stick ‘em in a little oil, and freeze the results in an ice cube tray so I have cute little blocks of seasoning ready for future use, blahblahblah.

But what I really want is for my herbs to stay perky longer so I can use them fresh, not frozen, and not all at once. I used to trim the ends off the herbs and stick them in a bit of fresh water, but within a day or three, herbs that had just been yanked out of the ground in my backyard or within a 20-mile radius of my kitchen started looking droopy and sad.

But there is a solution. And what’s even better is that it’s an easy one. Here we go:

INGREDIENTS:

  • Herbs

  • Jar/vase/glass/vessel of your choice

  • Water

  • Plastic bag

DIRECTIONS:

  • Grab the herbs, and remove any rubberband-twistie-tie-string-restrictive-type thingy from the bunch. Let them spread their stems and relax.

  • Trim a little off the ends of the stems.

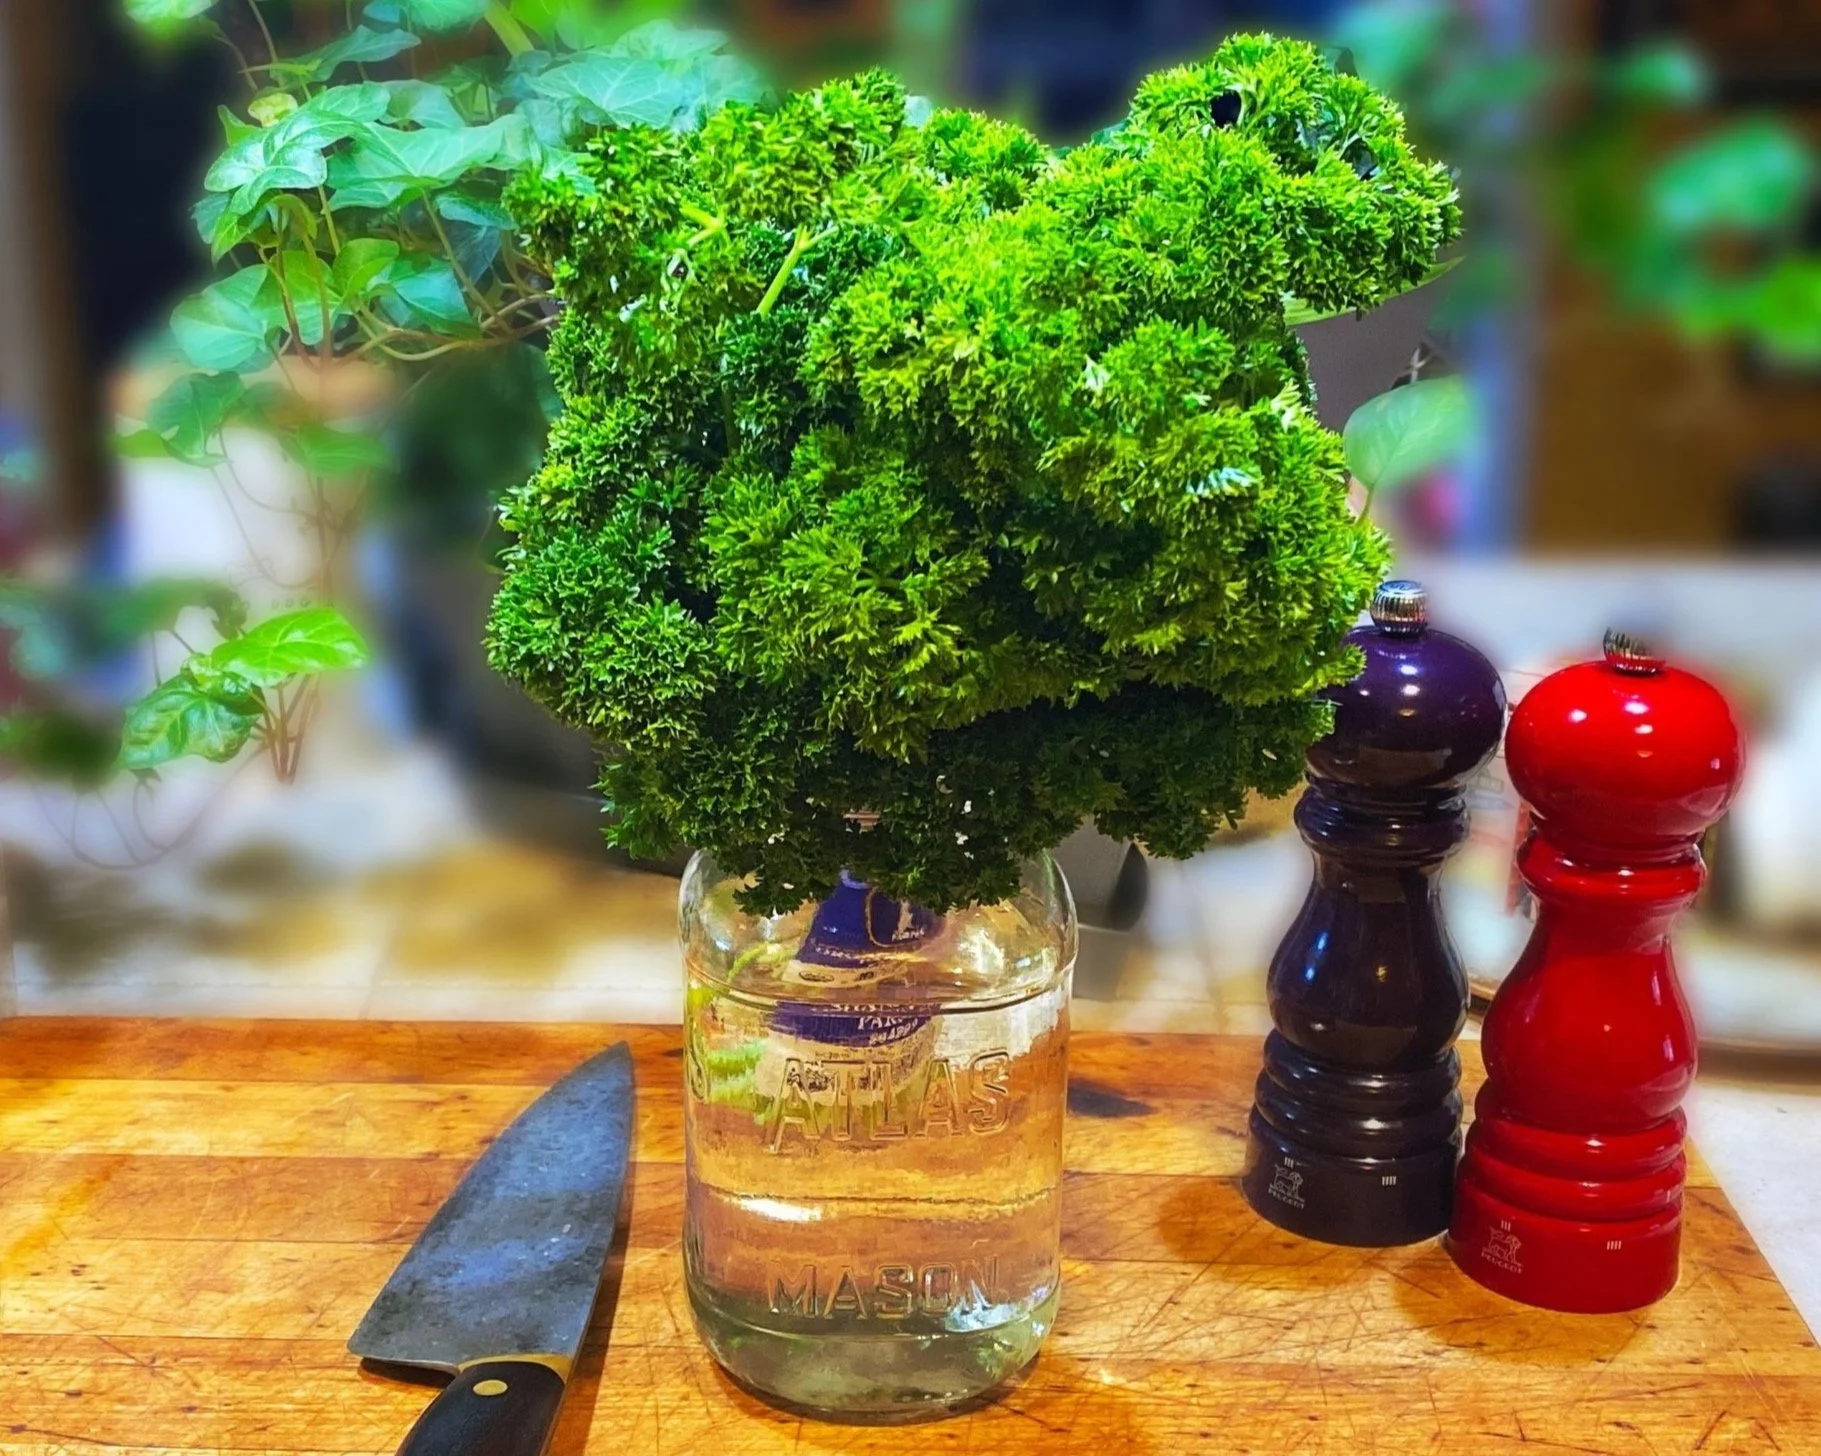
  • Take your chosen container. I use an old mason jar, but I live in Southern Appalachia so I am legally obligated to use an old mason jar for everything from drinking coffee to storing half-dead AA batteries.

  • Fill said container with water—not too hot, not too icy-cold. Get all Goldilocks about it.

  • Stick your herbs in the water. (Stems first. You knew that, right?) Try to keep any leaves out of the water. Think of it like arranging flowers. You don’t want the petals to be submerged.

  • Take your plastic bag. This is a good use for an old Ziploc bag, especially if you hoard those sorts of things because you can’t see a reason for throwing them away after you’ve only used them once and you can never get the smell out of them even when you wash them in the dishwasher (which feels like a stupid use of water anyway) and after all you kind of wish you hadn’t bought the Ziploc bags in the first place because you feel as though by this point in your life you should be able to think of something to contain your snacks or leftovers or granola or sandwiches in besides a pre-packaged, re-sealable plastic bag.

    I use an old Ziploc bag, but hey: You do you.

  • Gently and loosely place the bag over the top of the herbs and leave it open. You want to let the herbs breathe a little. Imagine you were putting a plastic bag over your own head. You would want some breathing room, right? (Please don’t do that.)

  • Place the jarred and bagged herb in your refrigerator. Like so:

A bunch of fresh parsley covered with a Ziplock bag sitting in a mason jar full of water on top of a cutting board, and in a refrigerator.

Seriously. I have had cilantro, parsley, and dill last more than two weeks in the fridge like this. And don’t even get me started on how chubby and turgid* my scallions are.

You’re welcome.

* Turgid,in biology, refers to a cell that it bursting at its organic seams with water. It is the opposite of flaccid. It can also mean, according to our friends over at the always exacting OED: “figurative in reference to language: Inflated, grandiloquent, pompous, bombastic.” So, was my use of “turgid” to describe my scallions an example of “turgid prose”? Discuss.

Roast 'Em If Ya Got 'Em

One of the culinary world’s most delectable, go-to sides is roasted potatoes. A little bit of crunch on the outside, a little bit of creamy, starchy goodness on the inside, and nice sop-a-bility for any tasty juices milling around on your plate.

Ready? Set? Mmmmm…..

Ingredients:

  • Potatoes. Surprise!

    Which kind, you ask? I like using Yukon Golds. They roast up a little browner than Russets —which I like for baking potatoes whole—and I think taste a tad sweeter. I almost never use white potatoes, though you certainly can. How about sweet potatoes? Yes, you can roast those, too. Also very delicious. However, sweet potatoes usually require a shorter cooking time and have a tendency to soak up more oil. So the following instructions are best for those Yukons.

  • Olive oil. No, not canola oil, coconut oil, palm oil, vegetable oil, avocado oil, sesame oil, 10W-30 motor oil or anything else. Olive oil. Period.

  • Two or three fresh rosemary sprigs.

  • Salt and pepper. Lots of it.

What to do:

  • Position a rack in the center of the oven and preheat the oven to 450°.

  • While the oven is heating up, cut your potatoes into nice, chunky pieces. DO NOT PEEL YOUR POTATOES. How big should the chunks be? The picture above is a good example of the size I like.

  • Take those potato chunks and put them in a large bowl. Cover them with salt. Lots. Don’t be shy. Pour on some olive oil. Again, don’t be stingy.

  • Grab the rosemary sprigs. About rosemary: It is a wonderful, hardy perennial in many places and a fantastic addition to any garden. When planted in the ground, rosemary usually requires little attention and can be used on meats, fish, veggies, you name it.

    So, take a sprig, rake off the needles with your hand, and given them a little chop if you like. Sometimes I do, sometimes I don’t. Sprinkle the rosemary over the potatoes and then mix everything all together. I like using my hands. Messy, yes, but fun.

  • I like to let the potatoes sit for about 20 minutes. You don’t have to. But, you know, I think you should.

  • Get a cookie sheet that has a little bit of a lip (so the oil doesn’t run off). I line mine with aluminum foil. Cover that cookie sheet with oil as well. Too much oil? I think not. But that’s me.

  • Lay the potatoes out in a single layer on the cookie sheet. Spread them out, and give them a little elbow room.

  • Sprinkle again with salt and hit them with some black pepper, as well.

  • Bake for about 25 minutes. Take them out and stick a fork in them to test doneness. They may very well need another 15 minutes or so. Before putting them back in the oven, pop the taters off the foil and flip them over to better distribute the browning deliciousness. Trust me: Use your hands.

  • At this point, keep an eye on them and test them about every ten minutes or so. Final cooking time will depend on your oven, how big your chunks are, and your personal crunch-to-cream ratio preference.

  • When done, let them sit for 10 minutes unless you’re impatient like me.

  • Salt! Pepper! Serve! Enjoy!

My Kinda Easy Sunday Chili Verde

ChiliVerde_DK.jpeg

Winter is for soups, stews, and chilis at my house. As a writer—and especially one on deadline—food prep on the weekend makes my work week much easier. Roast a chicken. Make bone broth. Make a big chili. Prep salad fixin’s for my lunches. And one of my favorite make-ahead meals—that also takes advantage of some awesome local Asheville producers—is chili verde.

Here’s how I kinda-sorta do it, more or less. (Or as my grandmother used to say as she tossed a few pinches of the nearest spice into the pot on the stove: “What do you mean how much? I don’t know how much. THIS much!!”)

  • Pork butt, 3-4 lbs.. I use local farmers Hickory Nut Gap out of Fairview, NC.

  • 1 16 oz. jar of salsa verde from Smoking J’s Fiery Foods, another local favorite.

  • 4 cans Hatch diced green chiles, 2 each of mild and hot.

  • 1 head garlic, chopped. (Yes, “head.” I sometimes use even more. Spice it up! It’s good for you!)

  • 1 yellow onion, chopped.

  • 1 cup or so broth. I make my own bone broth, but any chicken broth will do.

  • Olive oil. Cumin (I use 1 TBSP, then taste.) Oregano (I use at least 2 TBSP, but that’s me.) Salt, pepper…to taste, of course.

  • Wanna kick things up? Add a half cup sliced jalapeños.

My favorite—easy— way to do this is in a pressure cooker: (But a slow cooker is also fine.)

  1. Salt and pepper the pork.

  2. Cover the bottom of the pressure cooker in oil, and sauté the pork until brown on the outside. You can also brown in a pan if you must. Doing everything in one pot—pressure, slow cooker, whatever—means you keep all the juices and fat. LOTS of fat. Why keep the fat? Fat is tasty. That’s why.

  3. Dump in everything else. No need for ceremony or any particular order.

  4. Pressure cook on low for 3 1/2 hours. Let steam release naturally. OR, slow cook on high for at least six hours.

The meat should come apart very easily with only a fork. If the pork was particularly fatty, you may wish to spoon off some of the fat at this stage OR, refrigerate and scrape it off once it solidifies.

Serve over rice. Garnish with sour cream, cilantro, or whatever else floats your culinary boat. Add sharp cheddar and mix it up for a tasty, warm tortilla chip dip.

Keep On Cooking...

From pbs-food:

Julia Child would have turned 100 on August 15th! In her honor, PBS Digital Studios brings you a special birthday treat: a funky new Julia Child remix that celebrates her wisdom, wit & superb kitchen skills. Please share with your friends!

Join the PBSFood #CookForJulia Birthday Party, including rare videos, photos, tributes from your favorite chefs and more fun at http://www.pbs.org/juliachild

This is our jam! 

Julia has been auto tuned! Brilliant remix by melodysheep, aka John D. Boswell.  So bring on the roasted potatoes for one of the great ladies of all times. Off to go sauté something….